Background:
While working on a massive D365FO implementation project, I was asked by Project steering committee for an ability to enter weekly time at some central location for the internal team. They desired to record time against specific work stream on a particular week. The main purpose for such an application / utility is to get a high-level overview of the utilization of the internal team so that they can plan to utilize internal employee on this implementation project more efficiently with minimal impact to their actual day to day task. The ask was to spend as minimal time as possible.
Solution:
During discussion with the immediate manager, it was decided to create a time recording page / application leveraging SharePoint online capabilities. Apart from licensing, this was also a very easy to port solution within client’s environment.
Challenges:
The main challenge was that several useful SharePoint online features such as custom scripting has been moved to PowerApps. Since PowerApps required explicit license that was not available for the user, building any solution on top of PowerApps was not an option.
SharePoint Online Solution:
After analyzing all the requirements and challenges, I was able to create a simple time tracking app on SharePoint online with the following steps:
Create a SharePoint List
- Navigate to the SharePoint online website.
- Click on the Site Content from the menus appearing on the left pane.
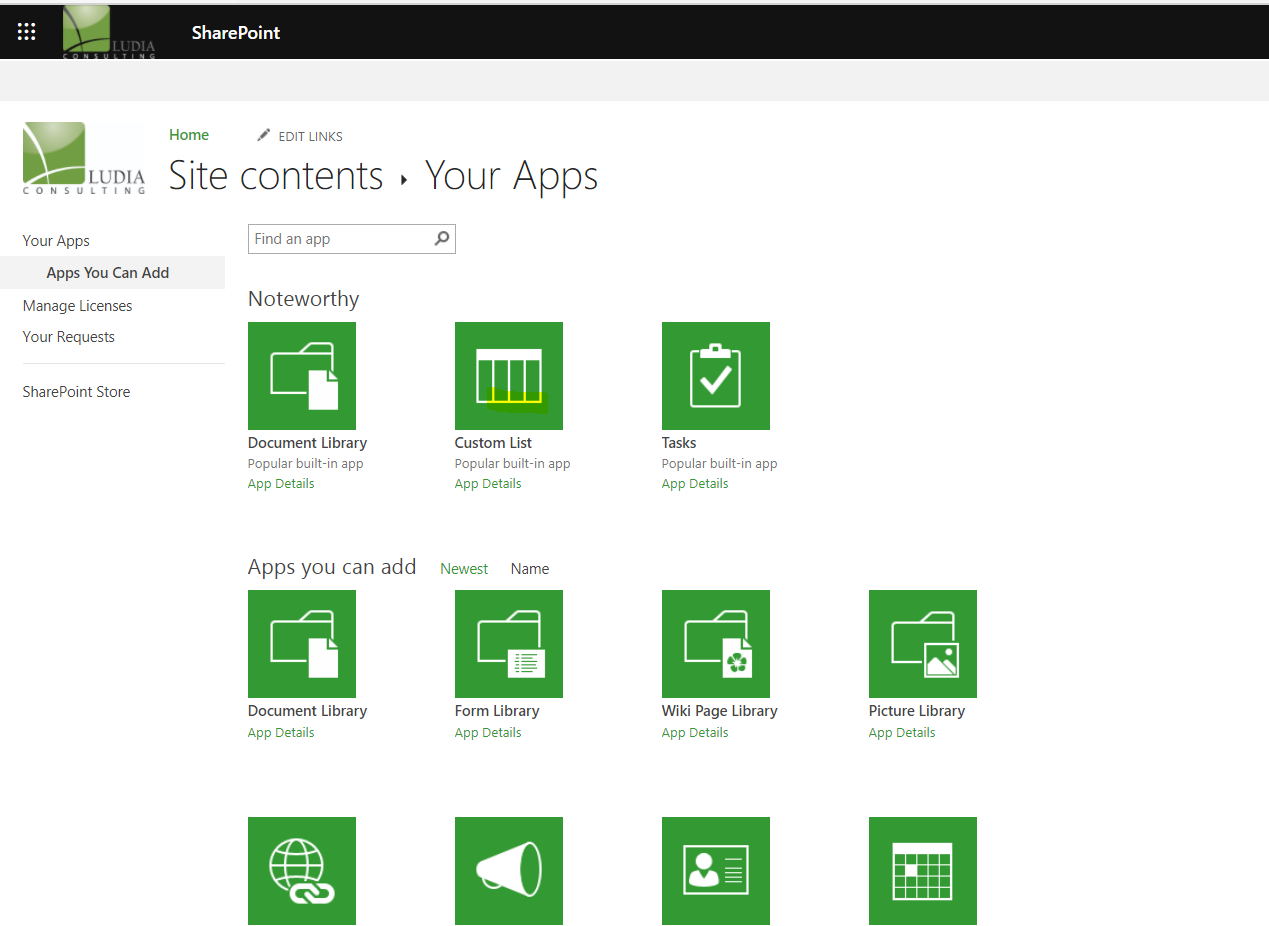
- On the top Action buttons, click on New, then click on App on the context menu that appear.

- Click on the Custom List in the page that appears with multiple options to choose from.
- In the “Adding Custom List” dialog, specify Name of the list and then click on Create button.
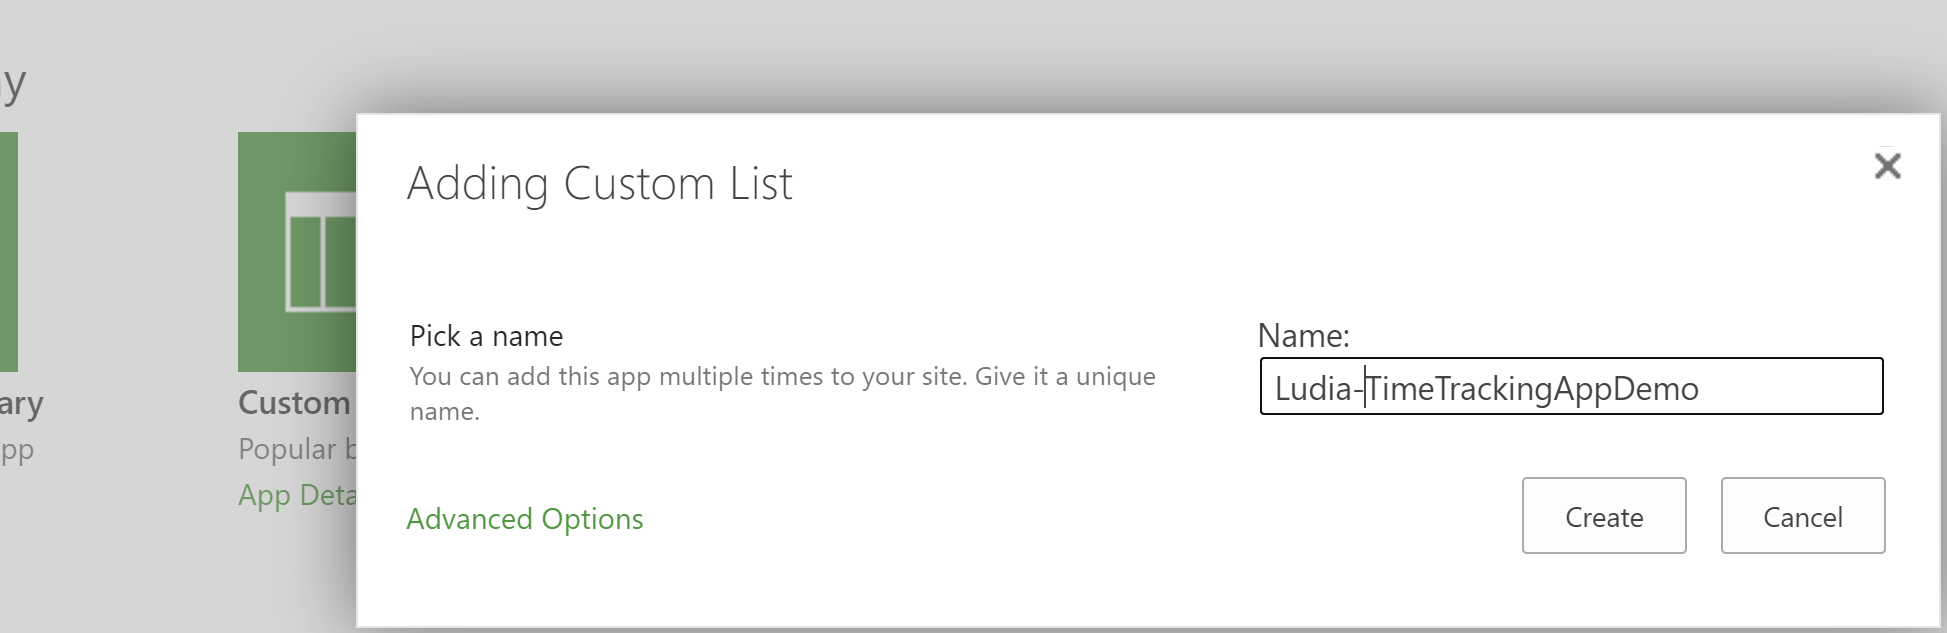
- If required, click on Advanced options to add more details. For this demo we will not be entering more details for the list.
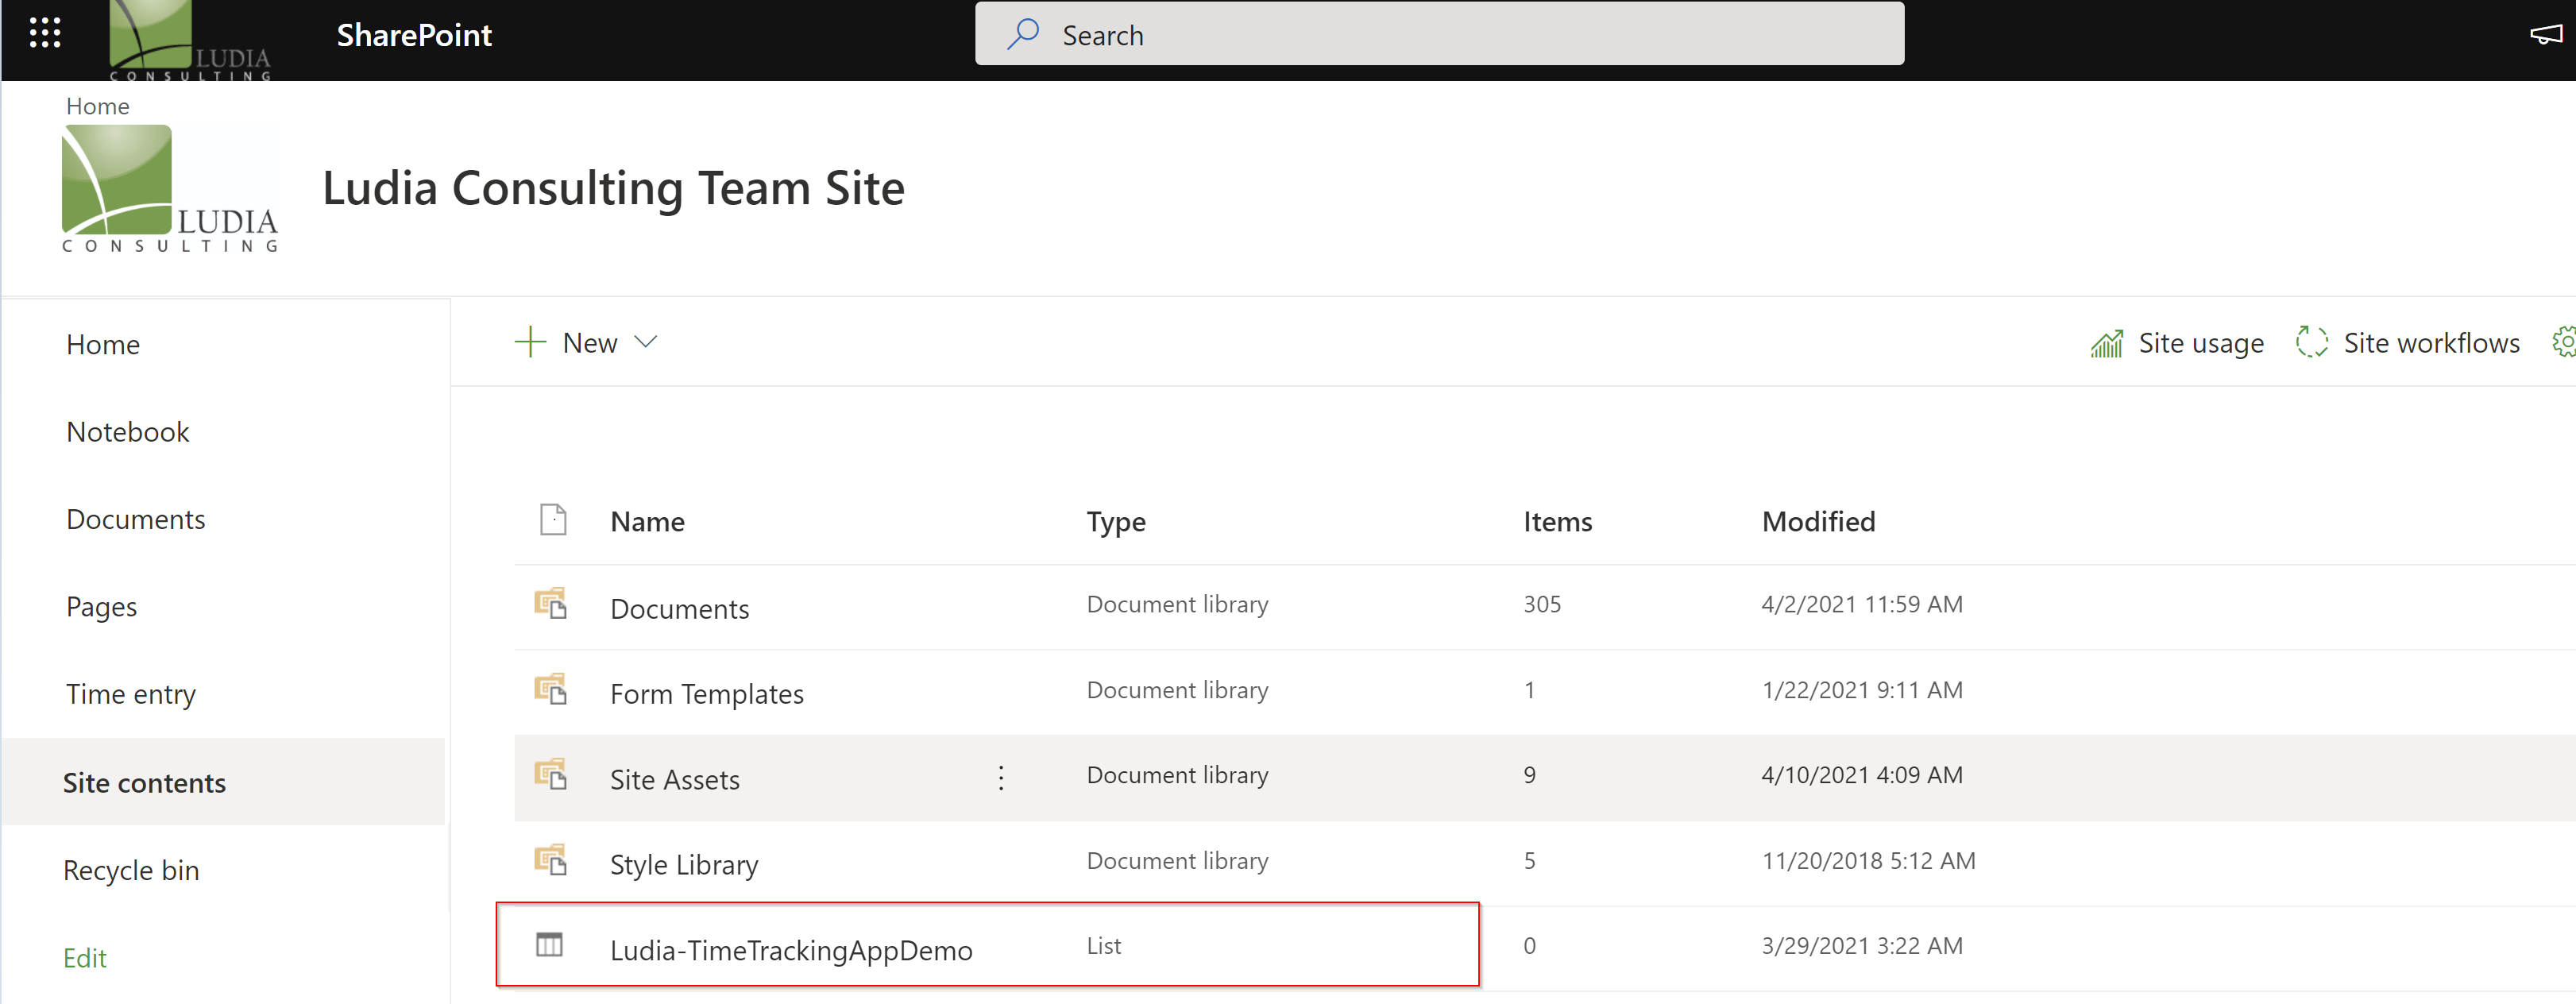
- Once the list has been created, it will start appearing on the main SharePoint Team Site.
- On the list, click on the three dots that are appearing on the right of the list name and click on “Settings”.
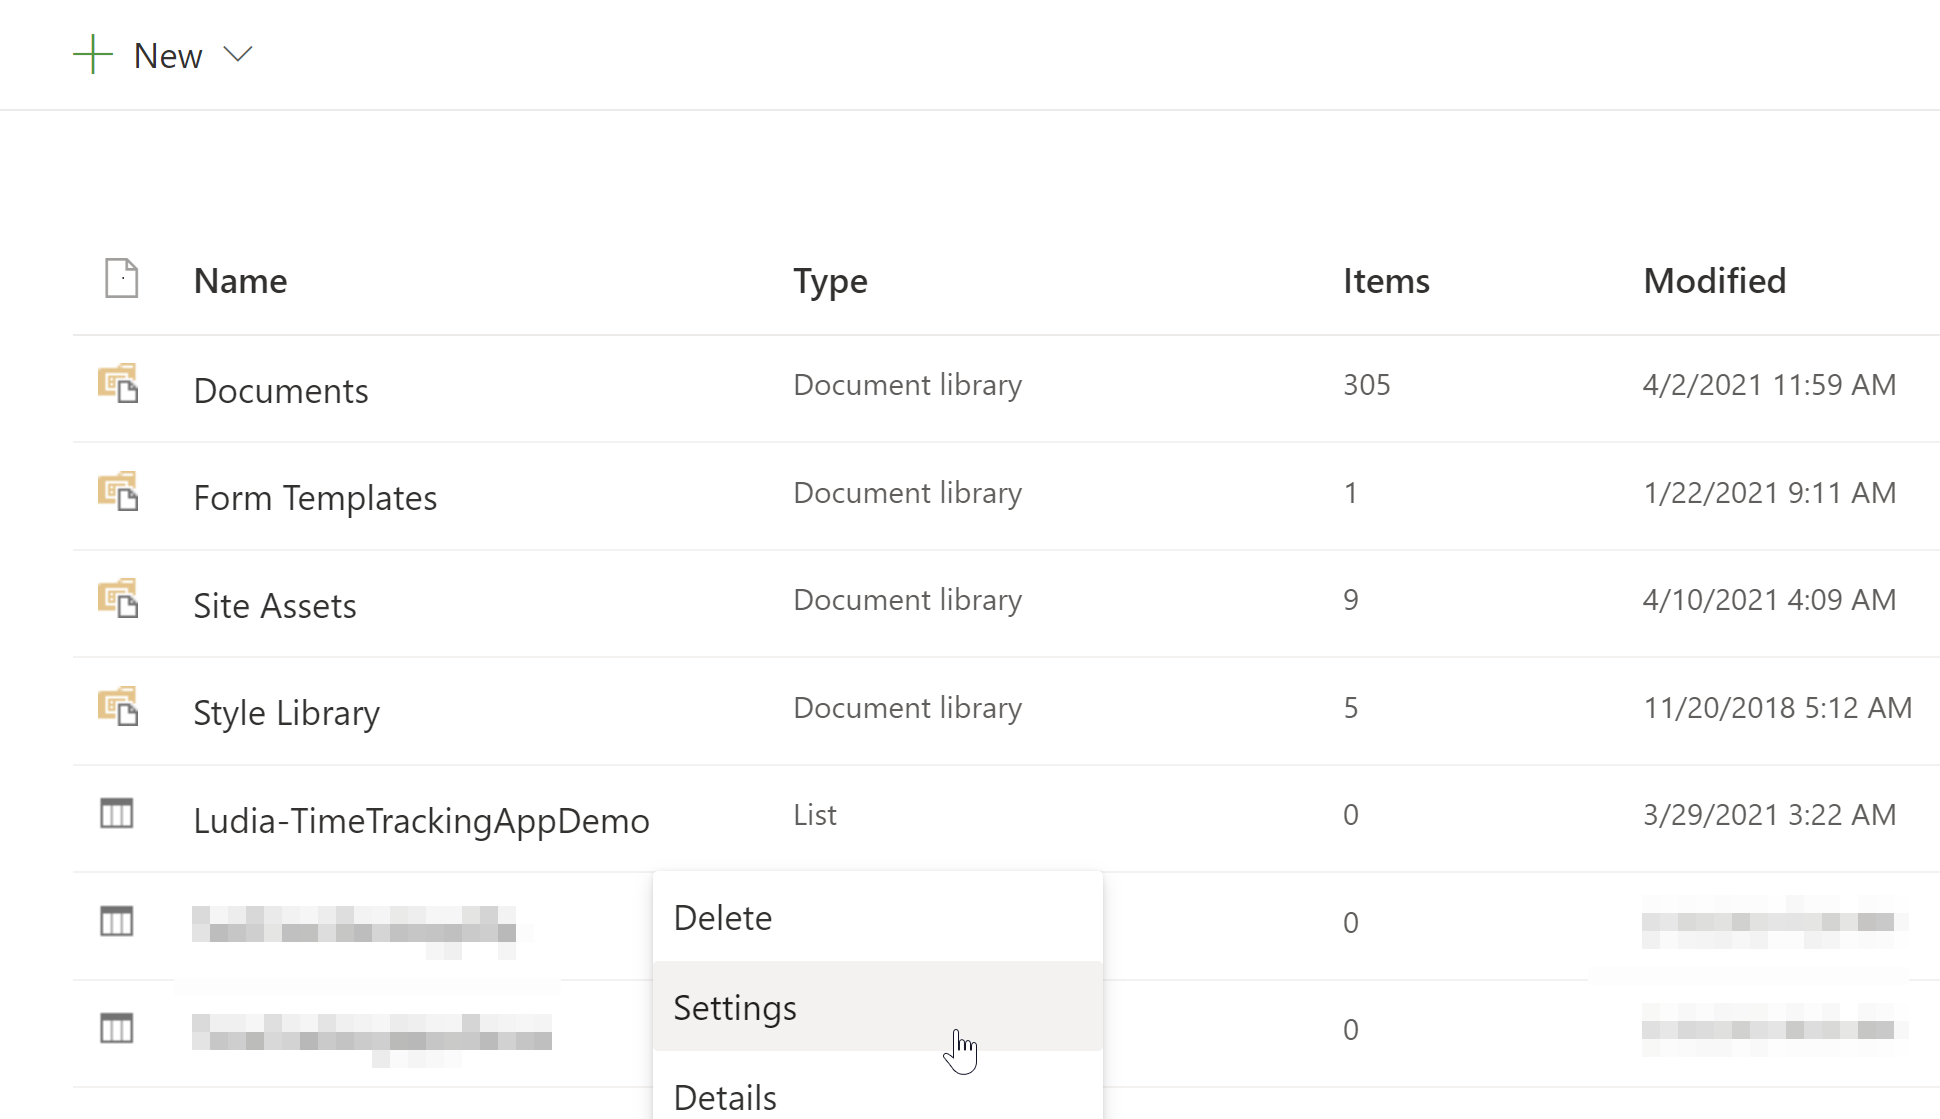
- This will open up the list settings page.
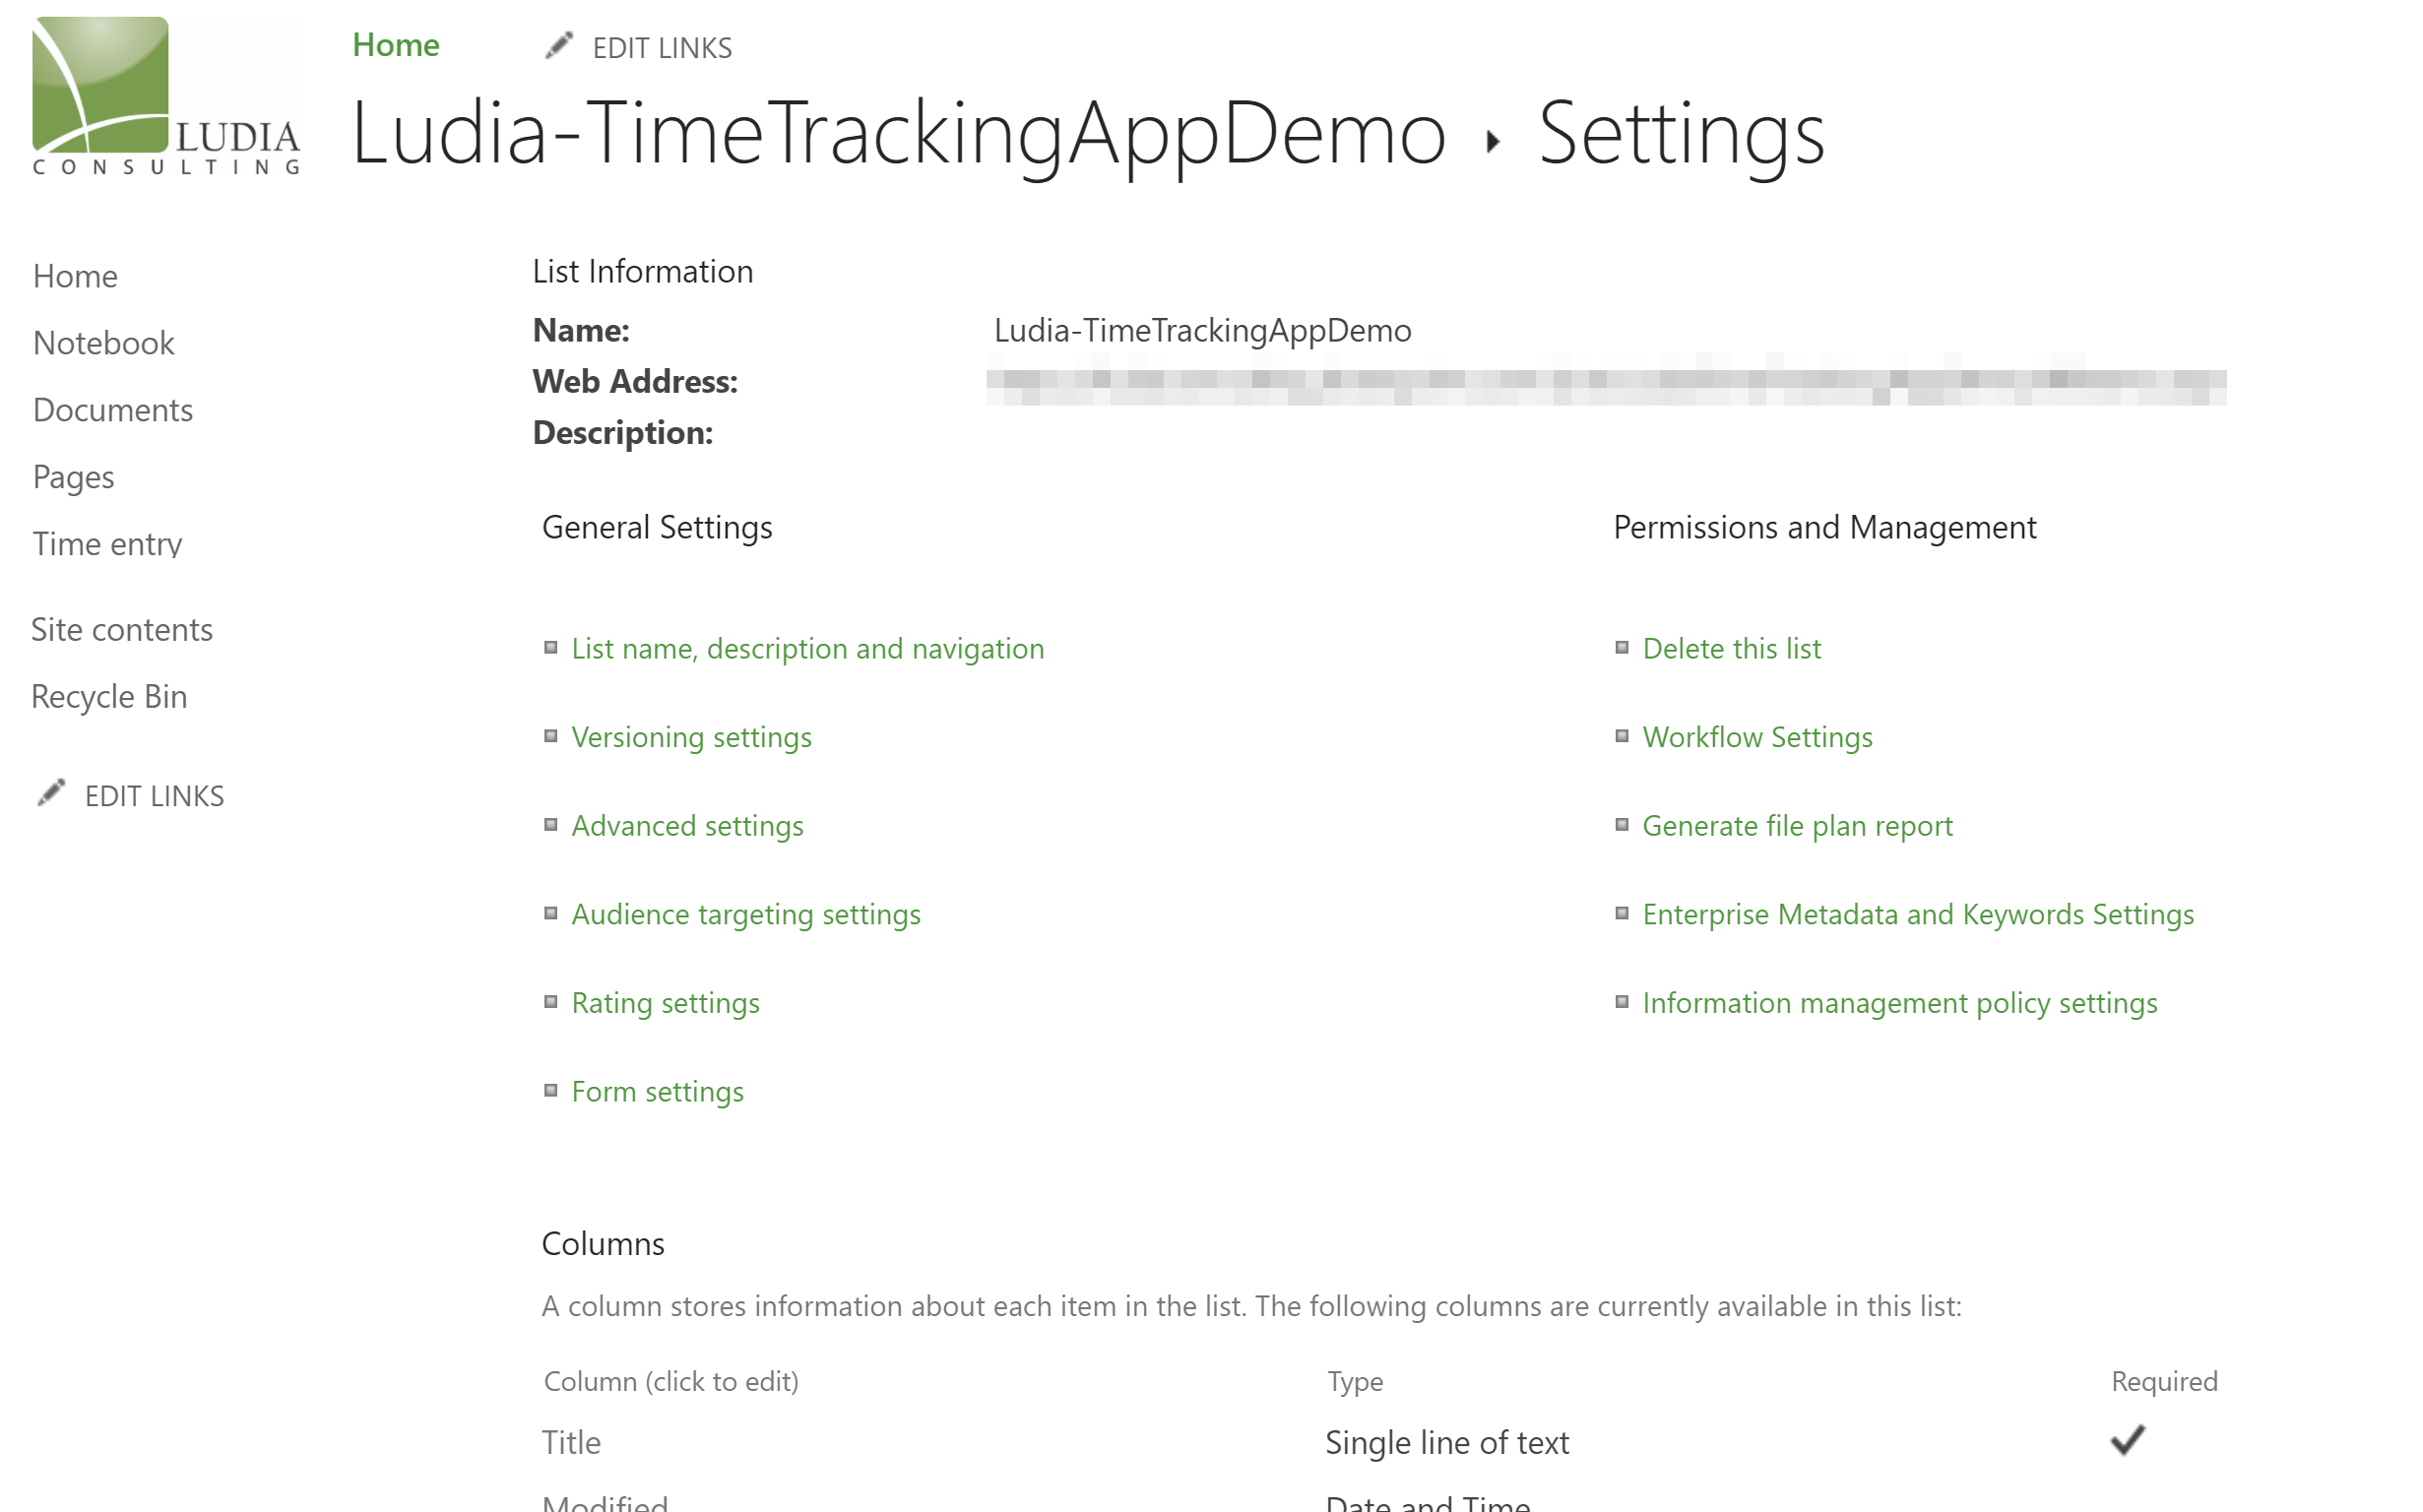
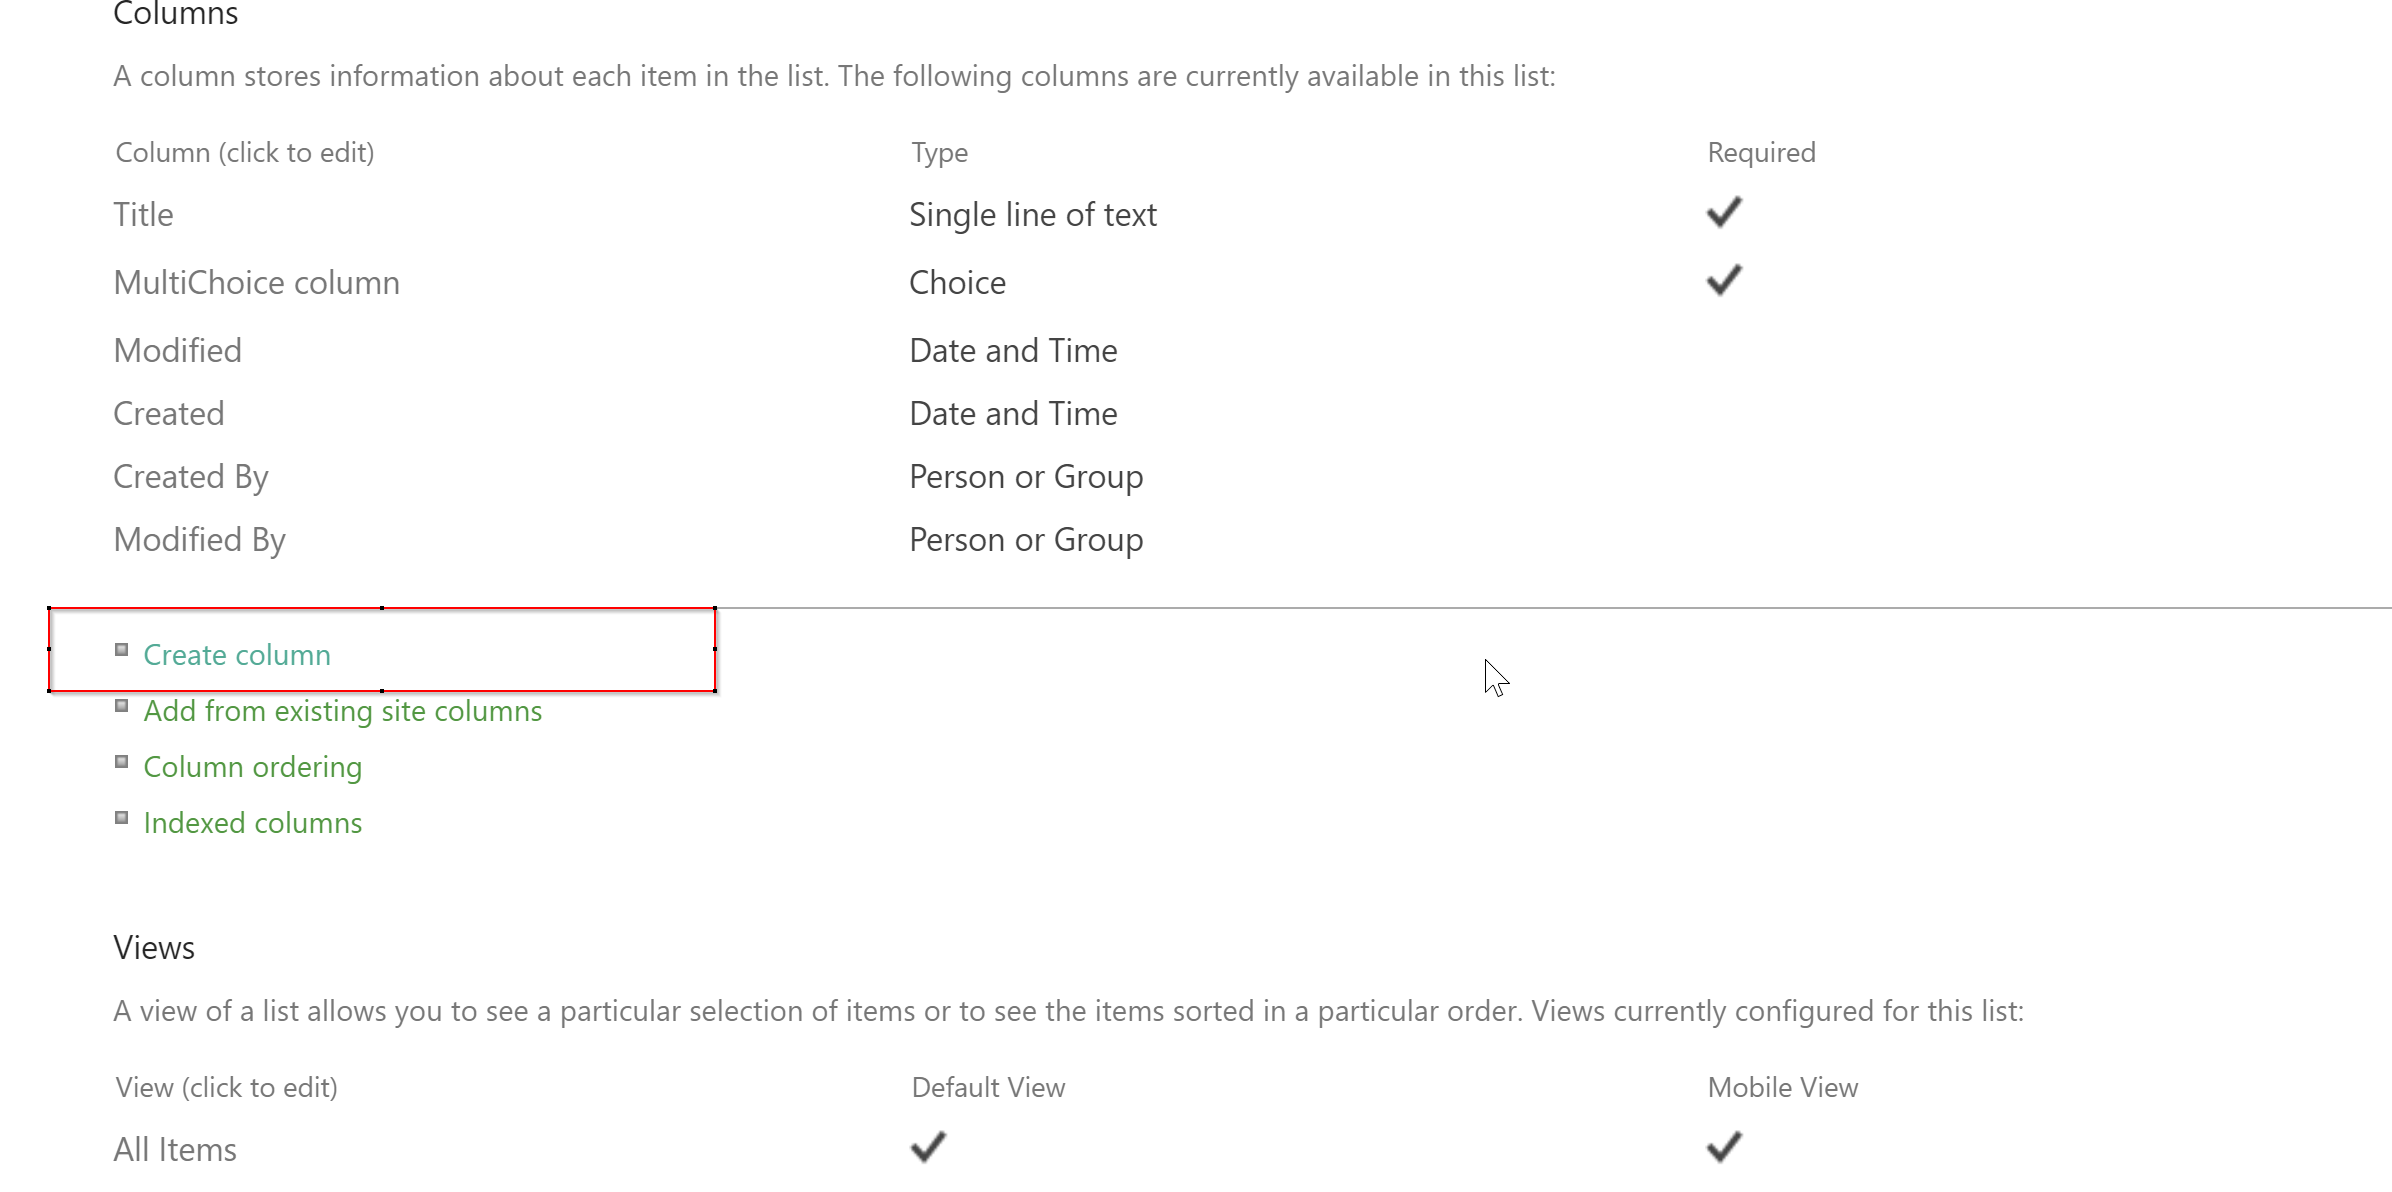
- The upper section of the page provides more options to add further details or change settings. In the Columns section below the settings, all the desired columns of the list can be specified.
- To add columns to the list, click on the “Create column” option within the Columns section.
- In the create column screen, specify details for Column name, data type, description , required or not required and any default value etc. If required, custom scripting can also be specified for the formatting.
The following screen shot provides an example of a column that enables users to select values from a drop down list
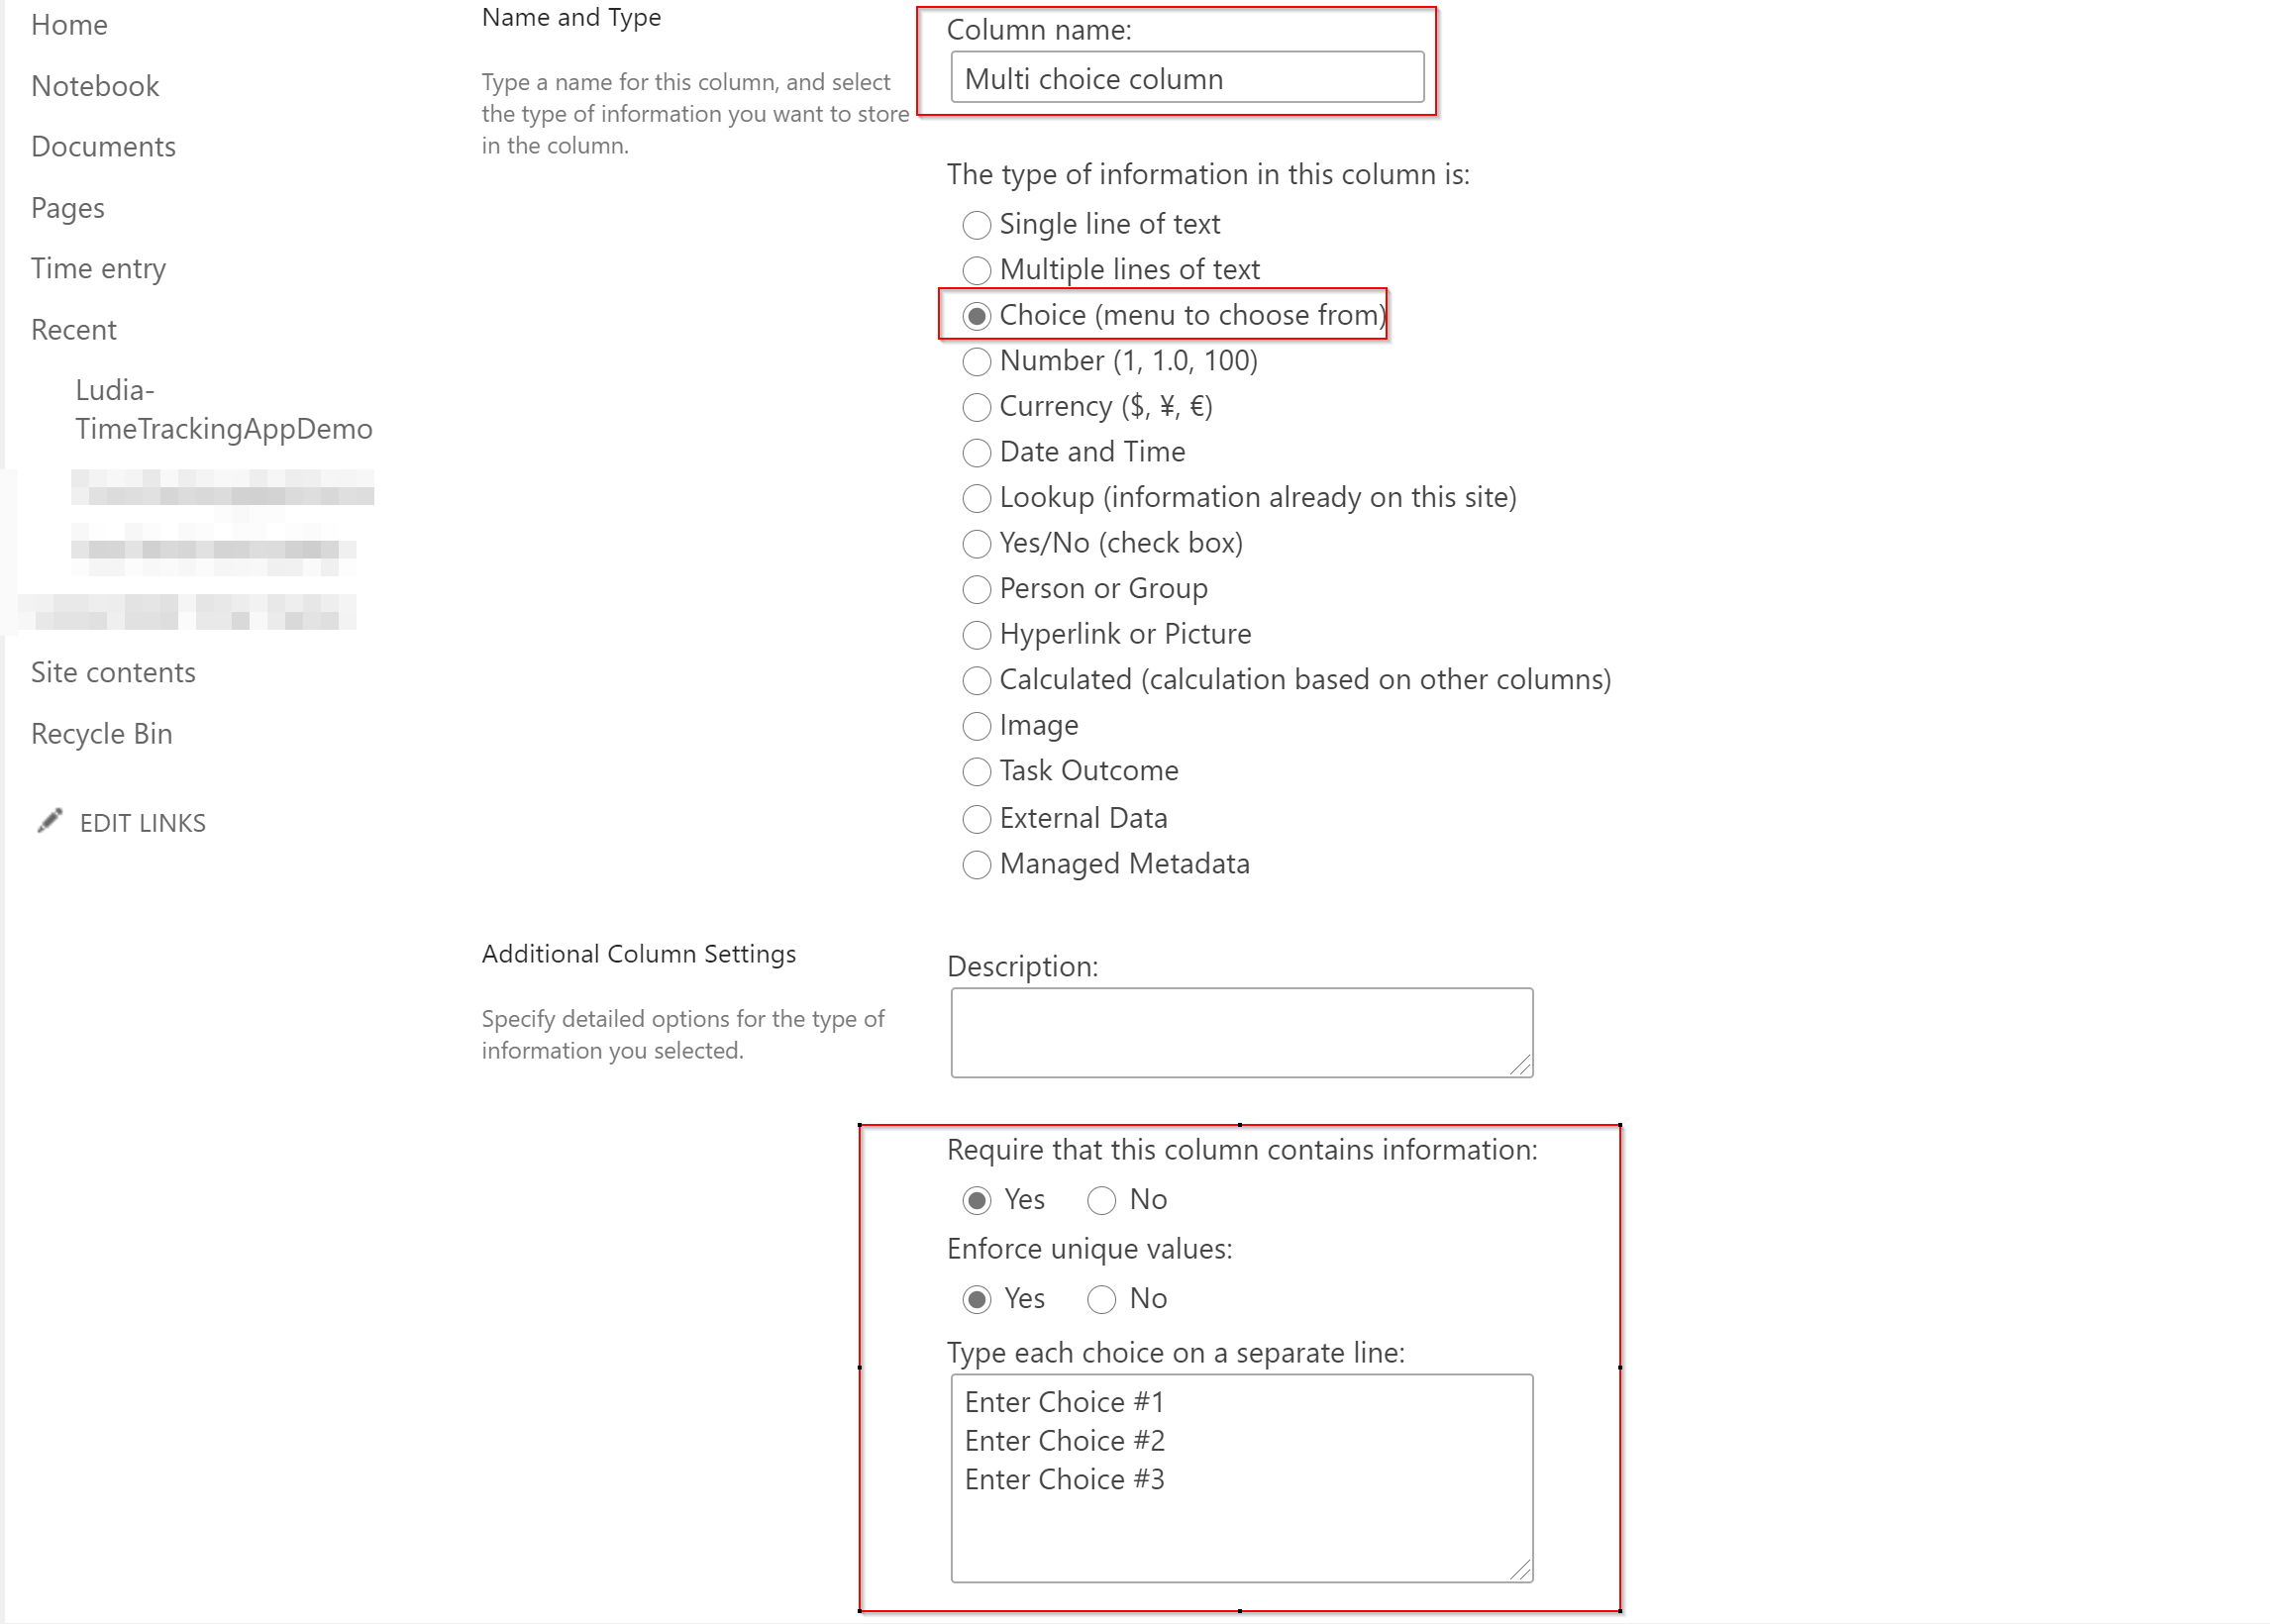
Please note that there are several systems generated columns such as Title, Created, Created by etc. These columns can be renamed but cannot be removed. In this scenario, we re-purposed the ‘Title’ column by renaming it to ‘Comments’ and making it a not-required column.
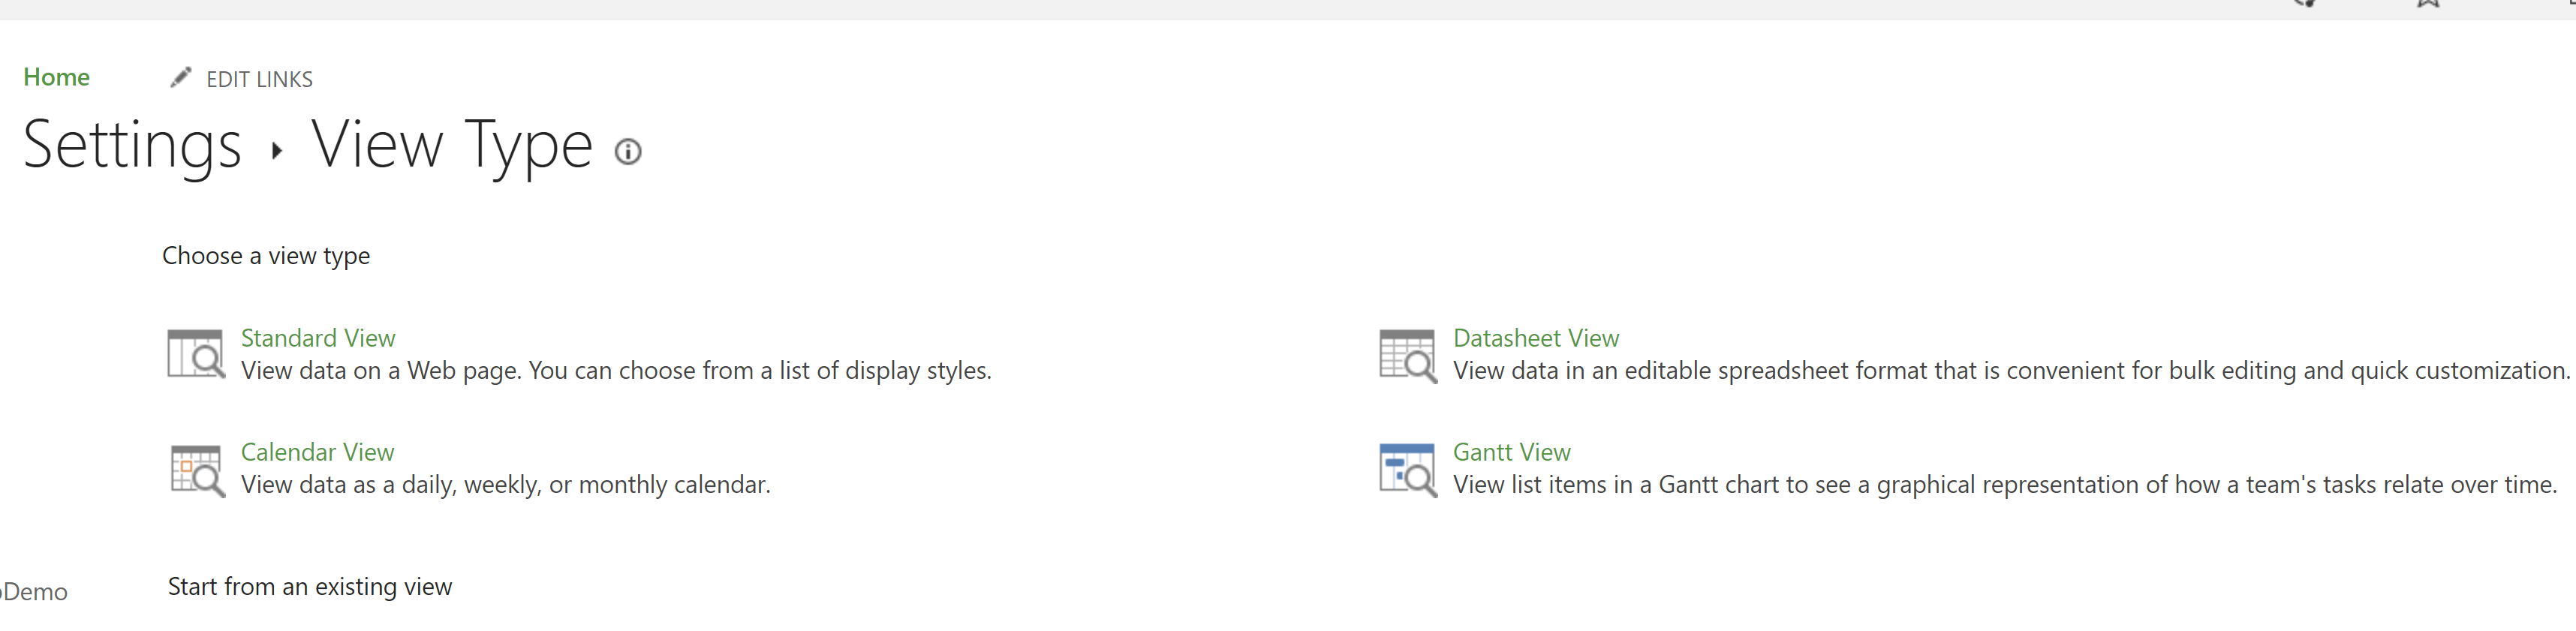
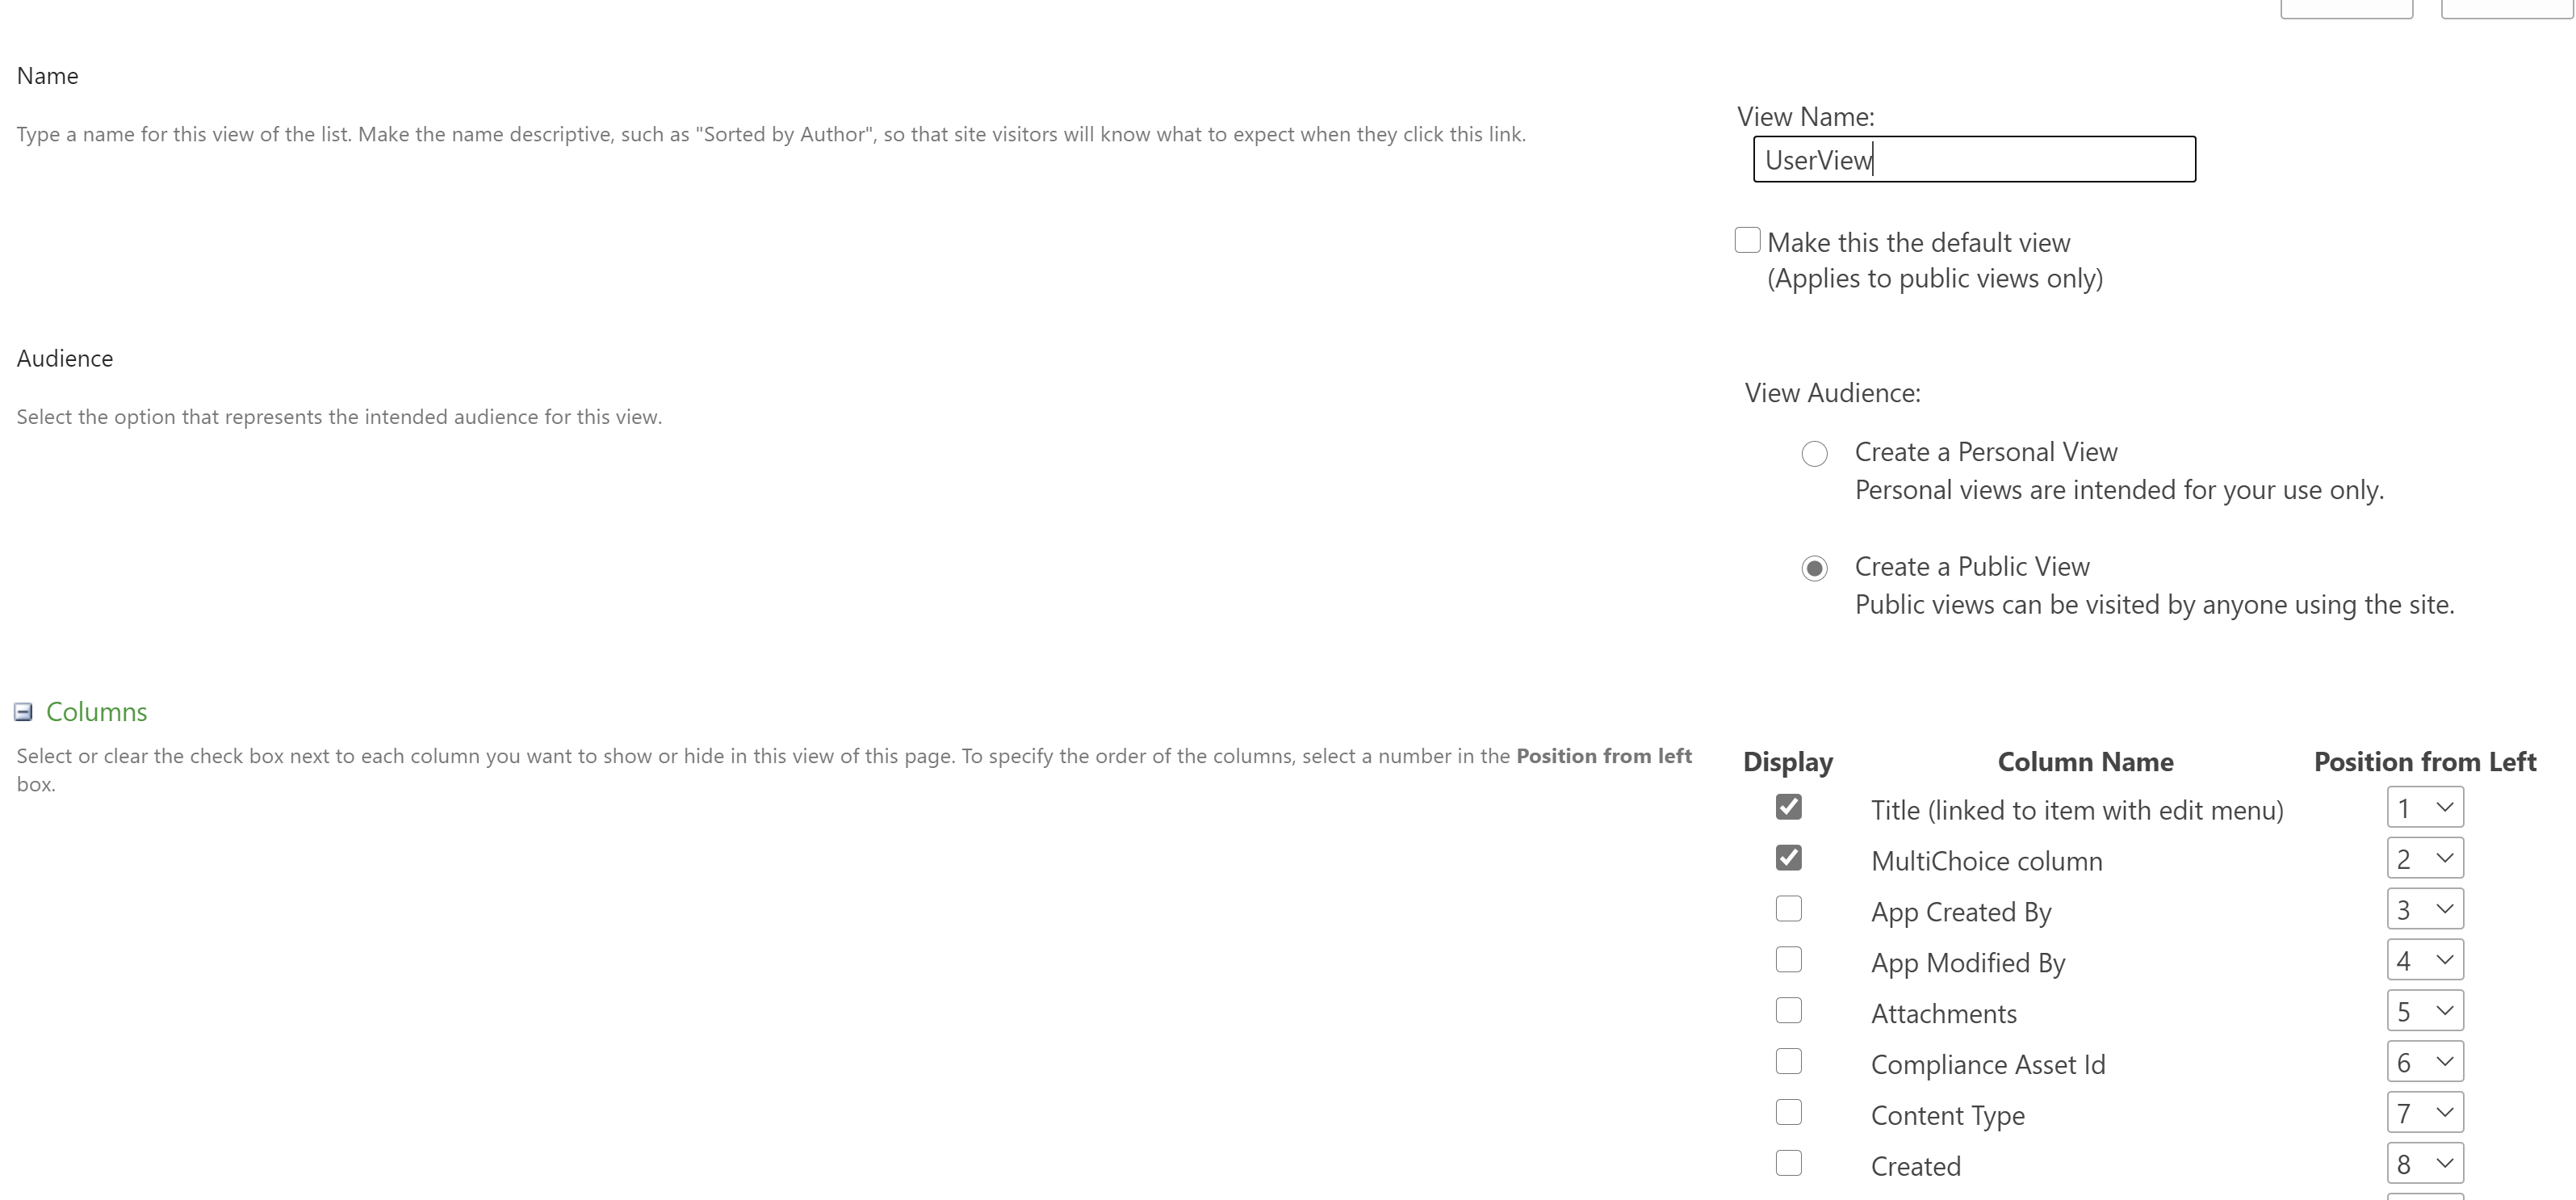
Create custom views:
After creating all the desired columns, custom views can be created. Depending on the requirements, views can be created to filter records by user, or group by certain column etc. In my case, I was required to create two views i.e., one for the user and one for the leadership. The user view should only display user’s records while the leadership or admin view should display all the records for everyone. While creating the user view, in order to avoid custom scripting, I re-purposed the ‘Created by’ field in my Custom List by renaming it to ‘Employee Name’. This field is automatically gets filled with the currently logged in user. For creating the view, I created a Standard view and set all the values as required.
The following is an example of the user view filtering records based on the currently logged in user.
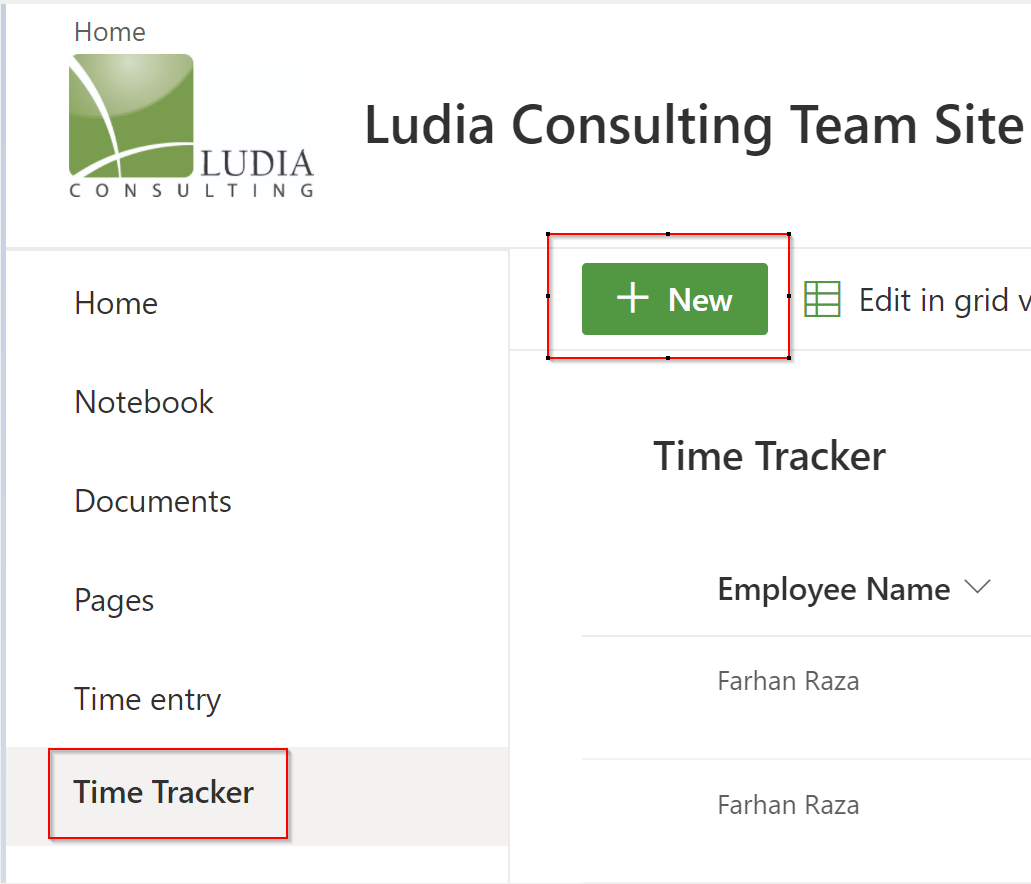
Once the views are created. The Time tracker application is complete. Now the user can start using it. Share with user the link to the SharePoint page for the custom list. User will then add entries by click new and adding required info.

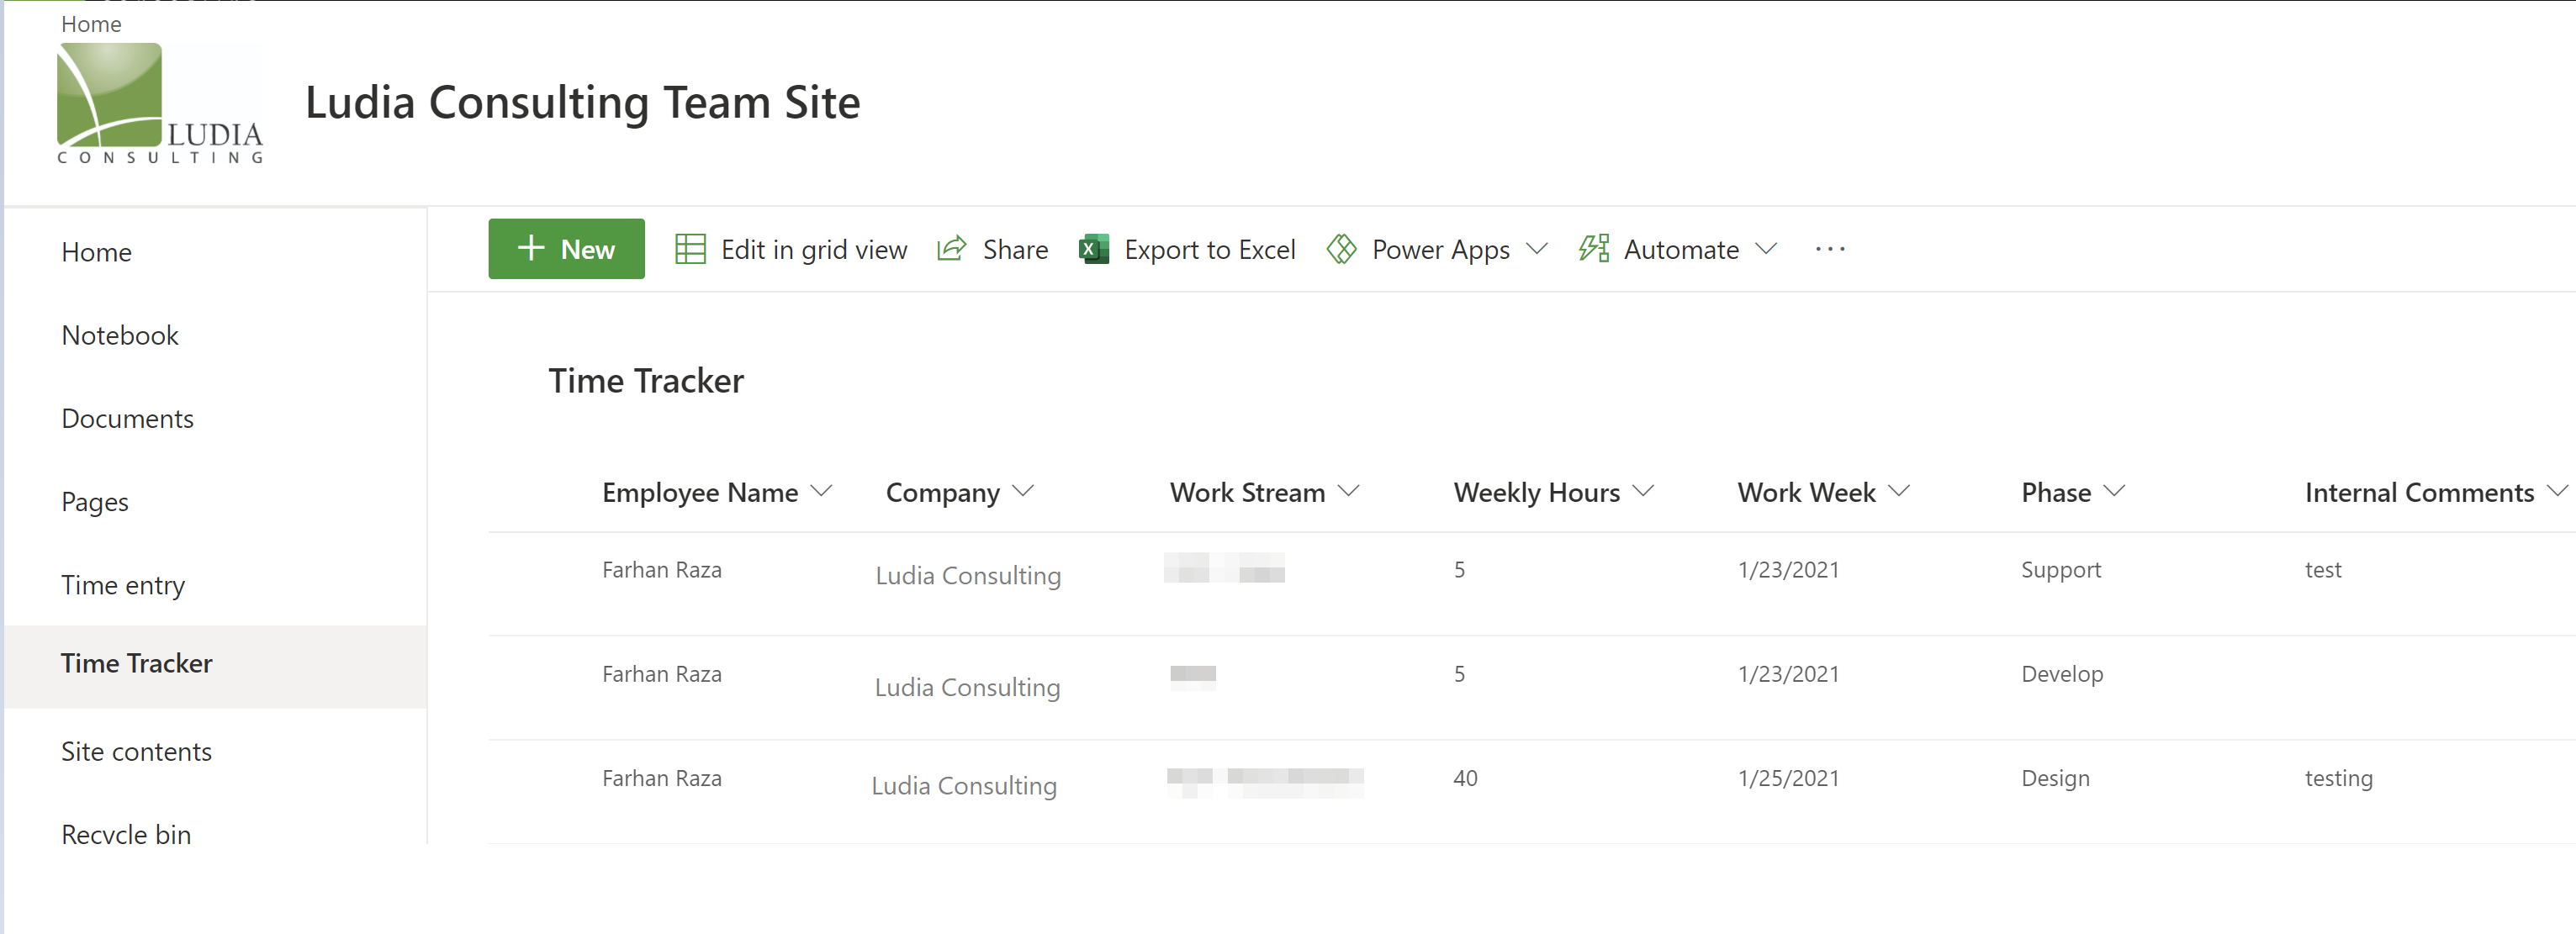
UserView:
Following is an example of the time tracking application.
Conclusion:
By leveraging the existing SharePoint licensing, we are able to fulfill the requirement of the client with minimal effort. For more details regarding the above application or in case of any other technical challenges or inquiries, please feel free to reach out to at [email protected]